![[JHG]](JHGlogo.png "Howard Gibson") Pine Bookshelves
Pine Bookshelves
Pine Bookshelves
Pine Bookshelves
Most CAD programs understand DXF format. I did these in Ribbonsoft's QCAD. Older versions of it are Free Software, as per the GNU Public License. You can purchase the latest version of it if you want. This allows you to modify my drawings. Before you change stuff, make the sketch layer visible.
PNG is a raster file format, supported by web browsers. The format is 1500 pixels wide by 2000 pixels high. If your monitor is not big enough, each browser seems to have its own way to make it fit on your screen. You should be able to save it, load it into your favourite graphics program, and then print it. Some browsers will scale it to fit on the printer.
XLS is of course, Microsoft's Excel format, supported by all the other spreadsheets. I would have liked to provide ODF (Open Document) format, but I don't think this is supported enough.
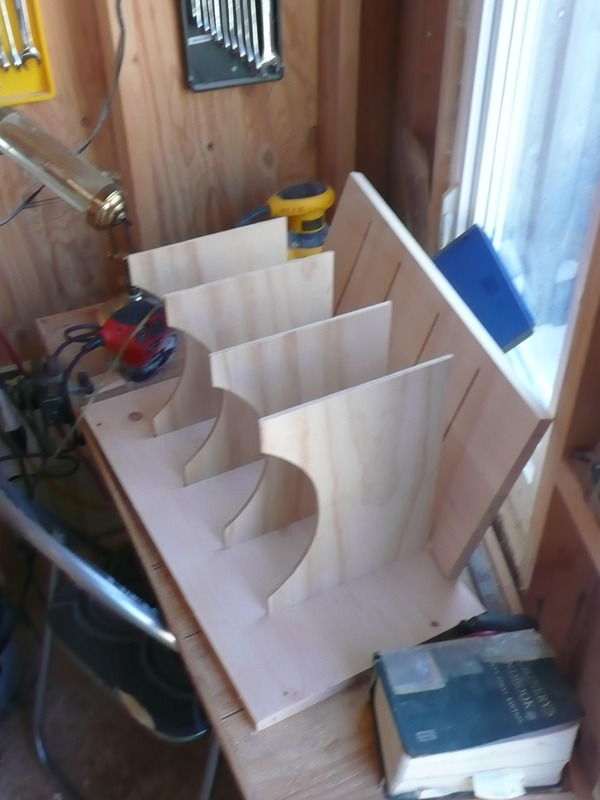
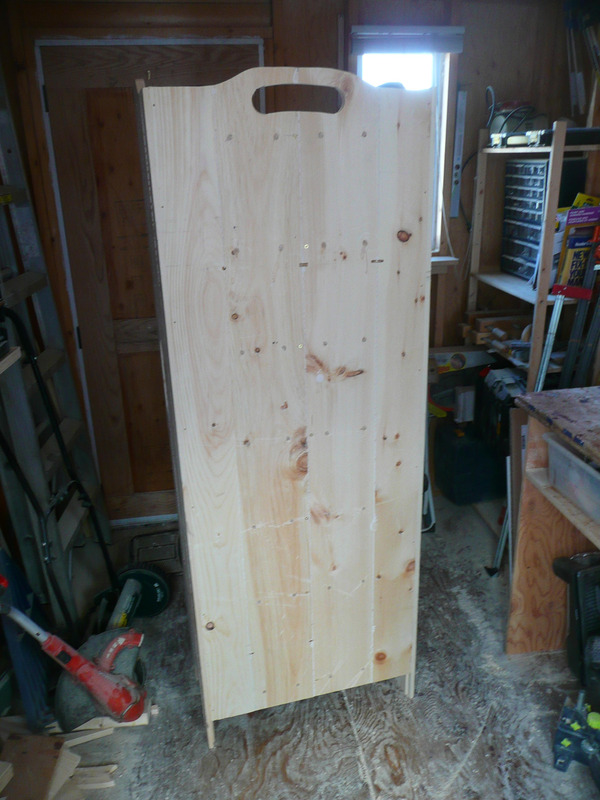
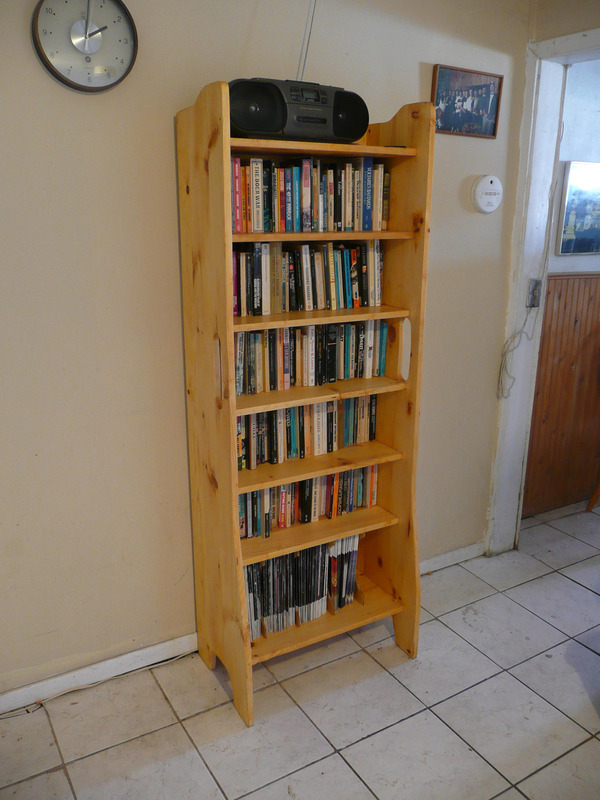
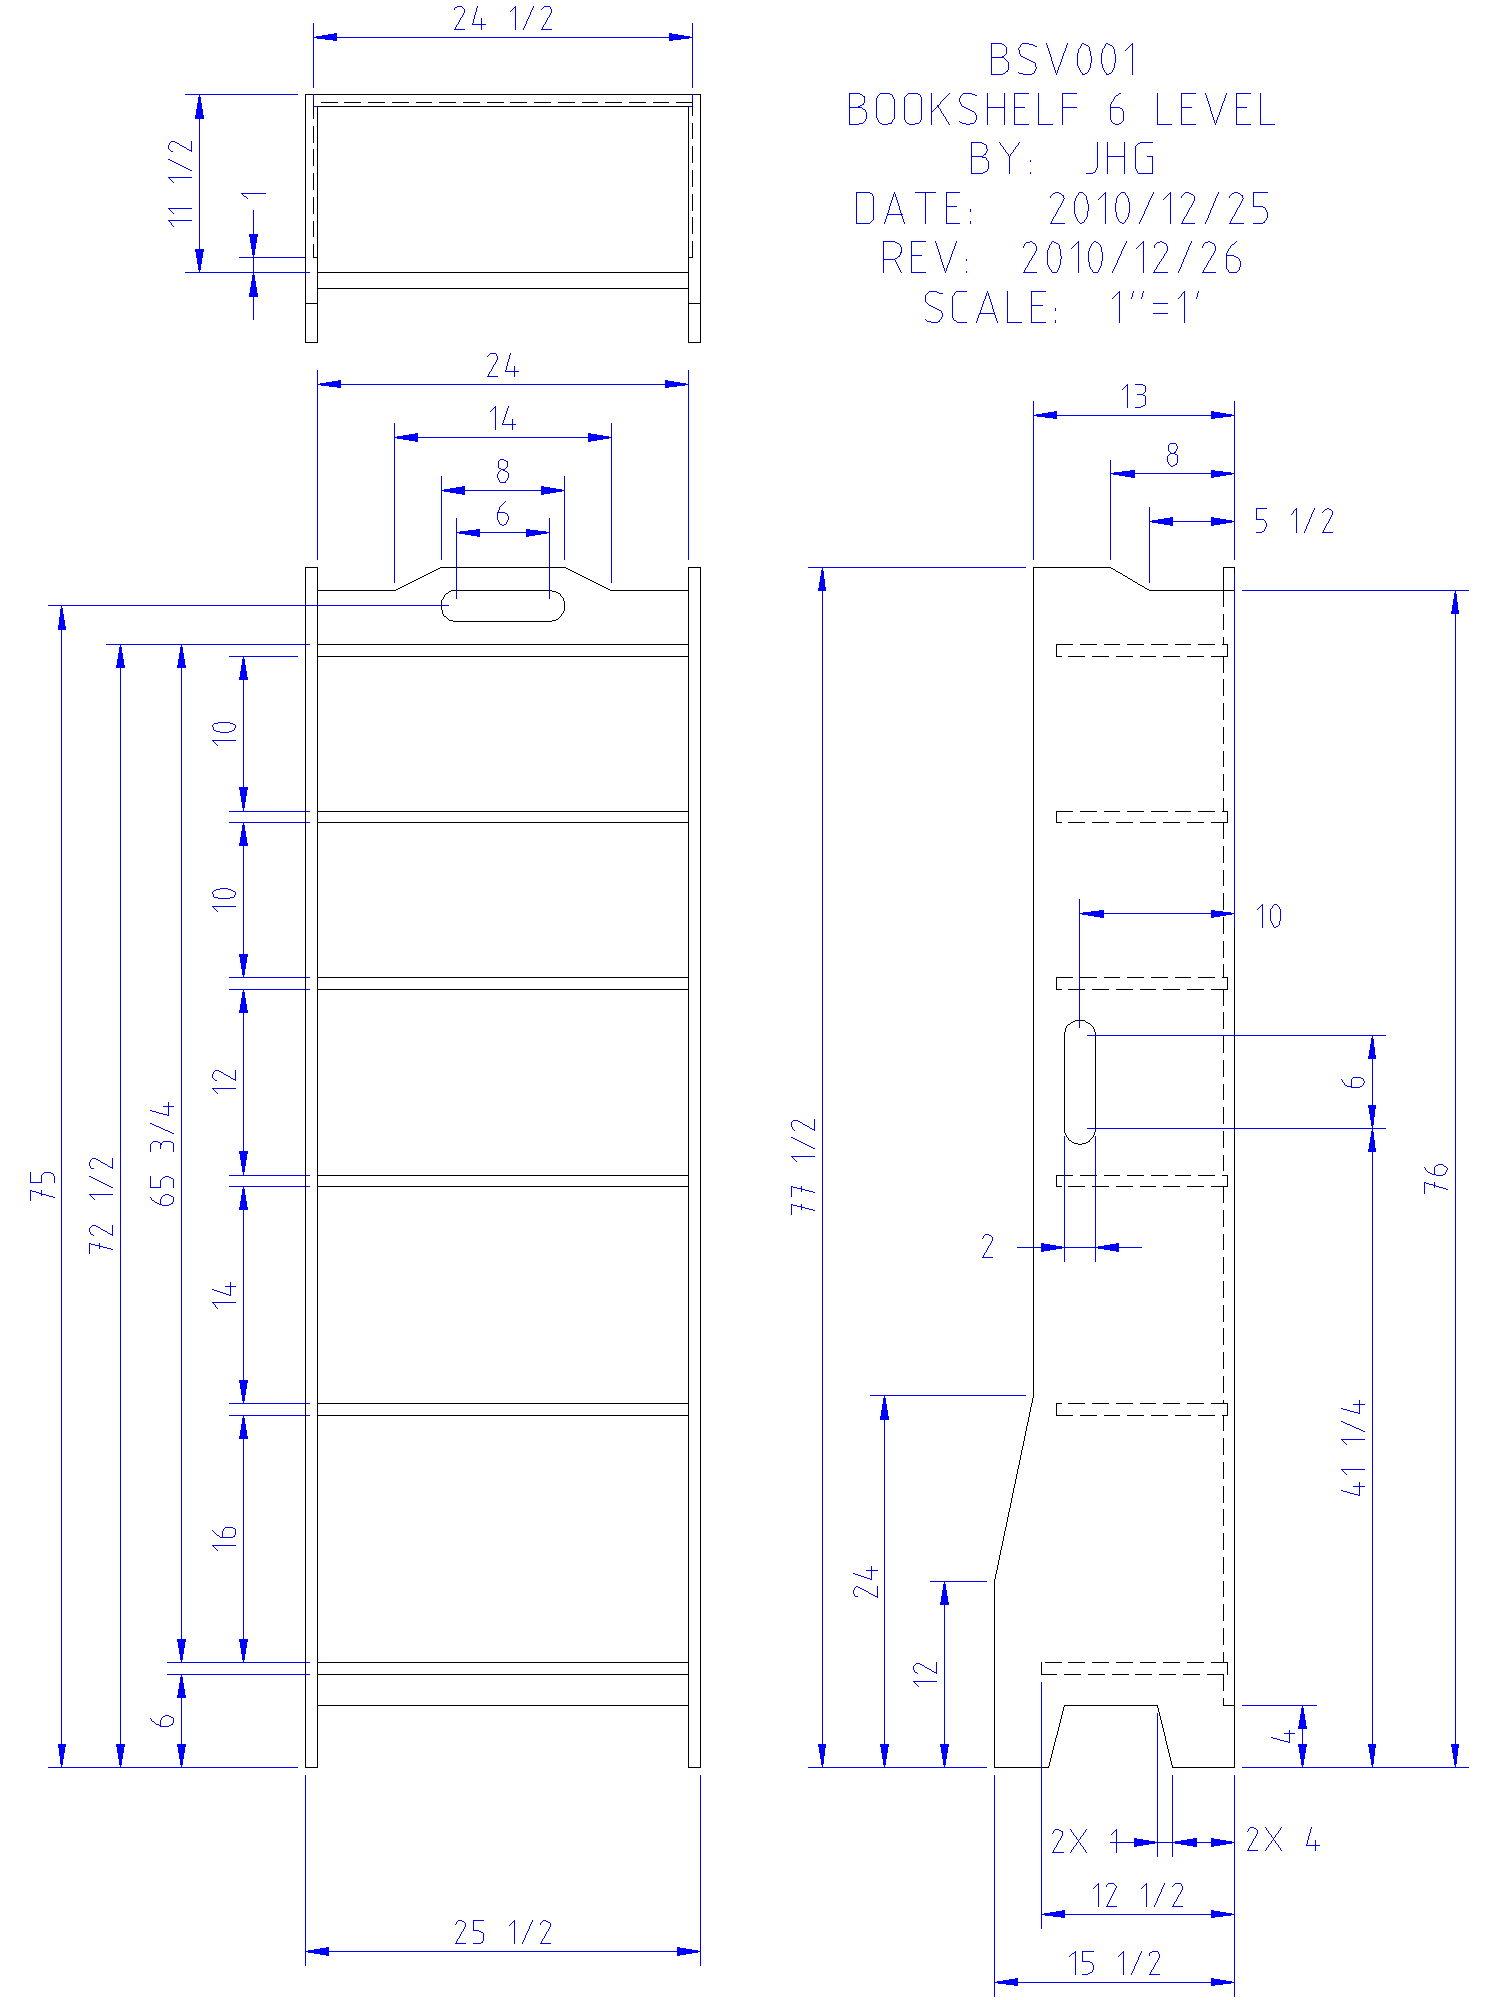
These are designed as sort of informal bookshelves. I figure the curvy sides will look nice. I do not like flat topped bookshelves. The walls around the top ensure that you can put stuff up there and it will not fall down the back. The holes in the sides are handles that really do make it easier to move the bookshelves around.
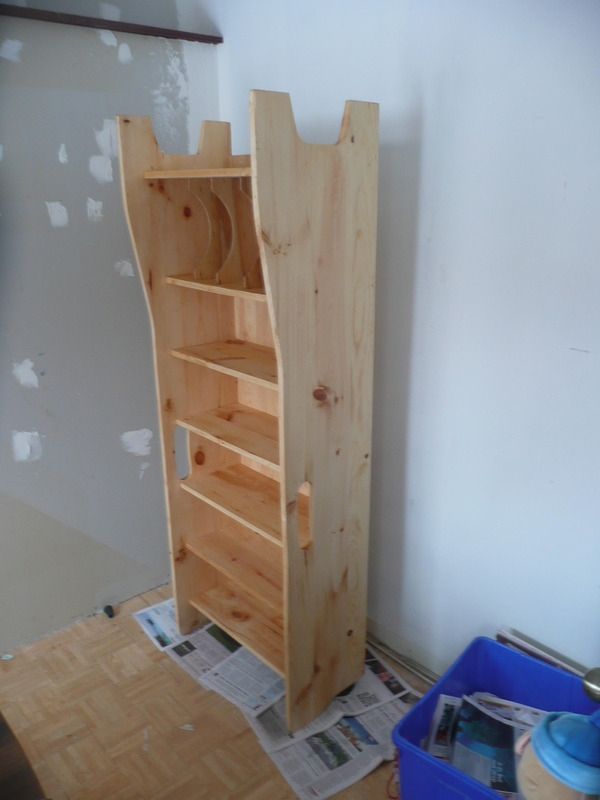
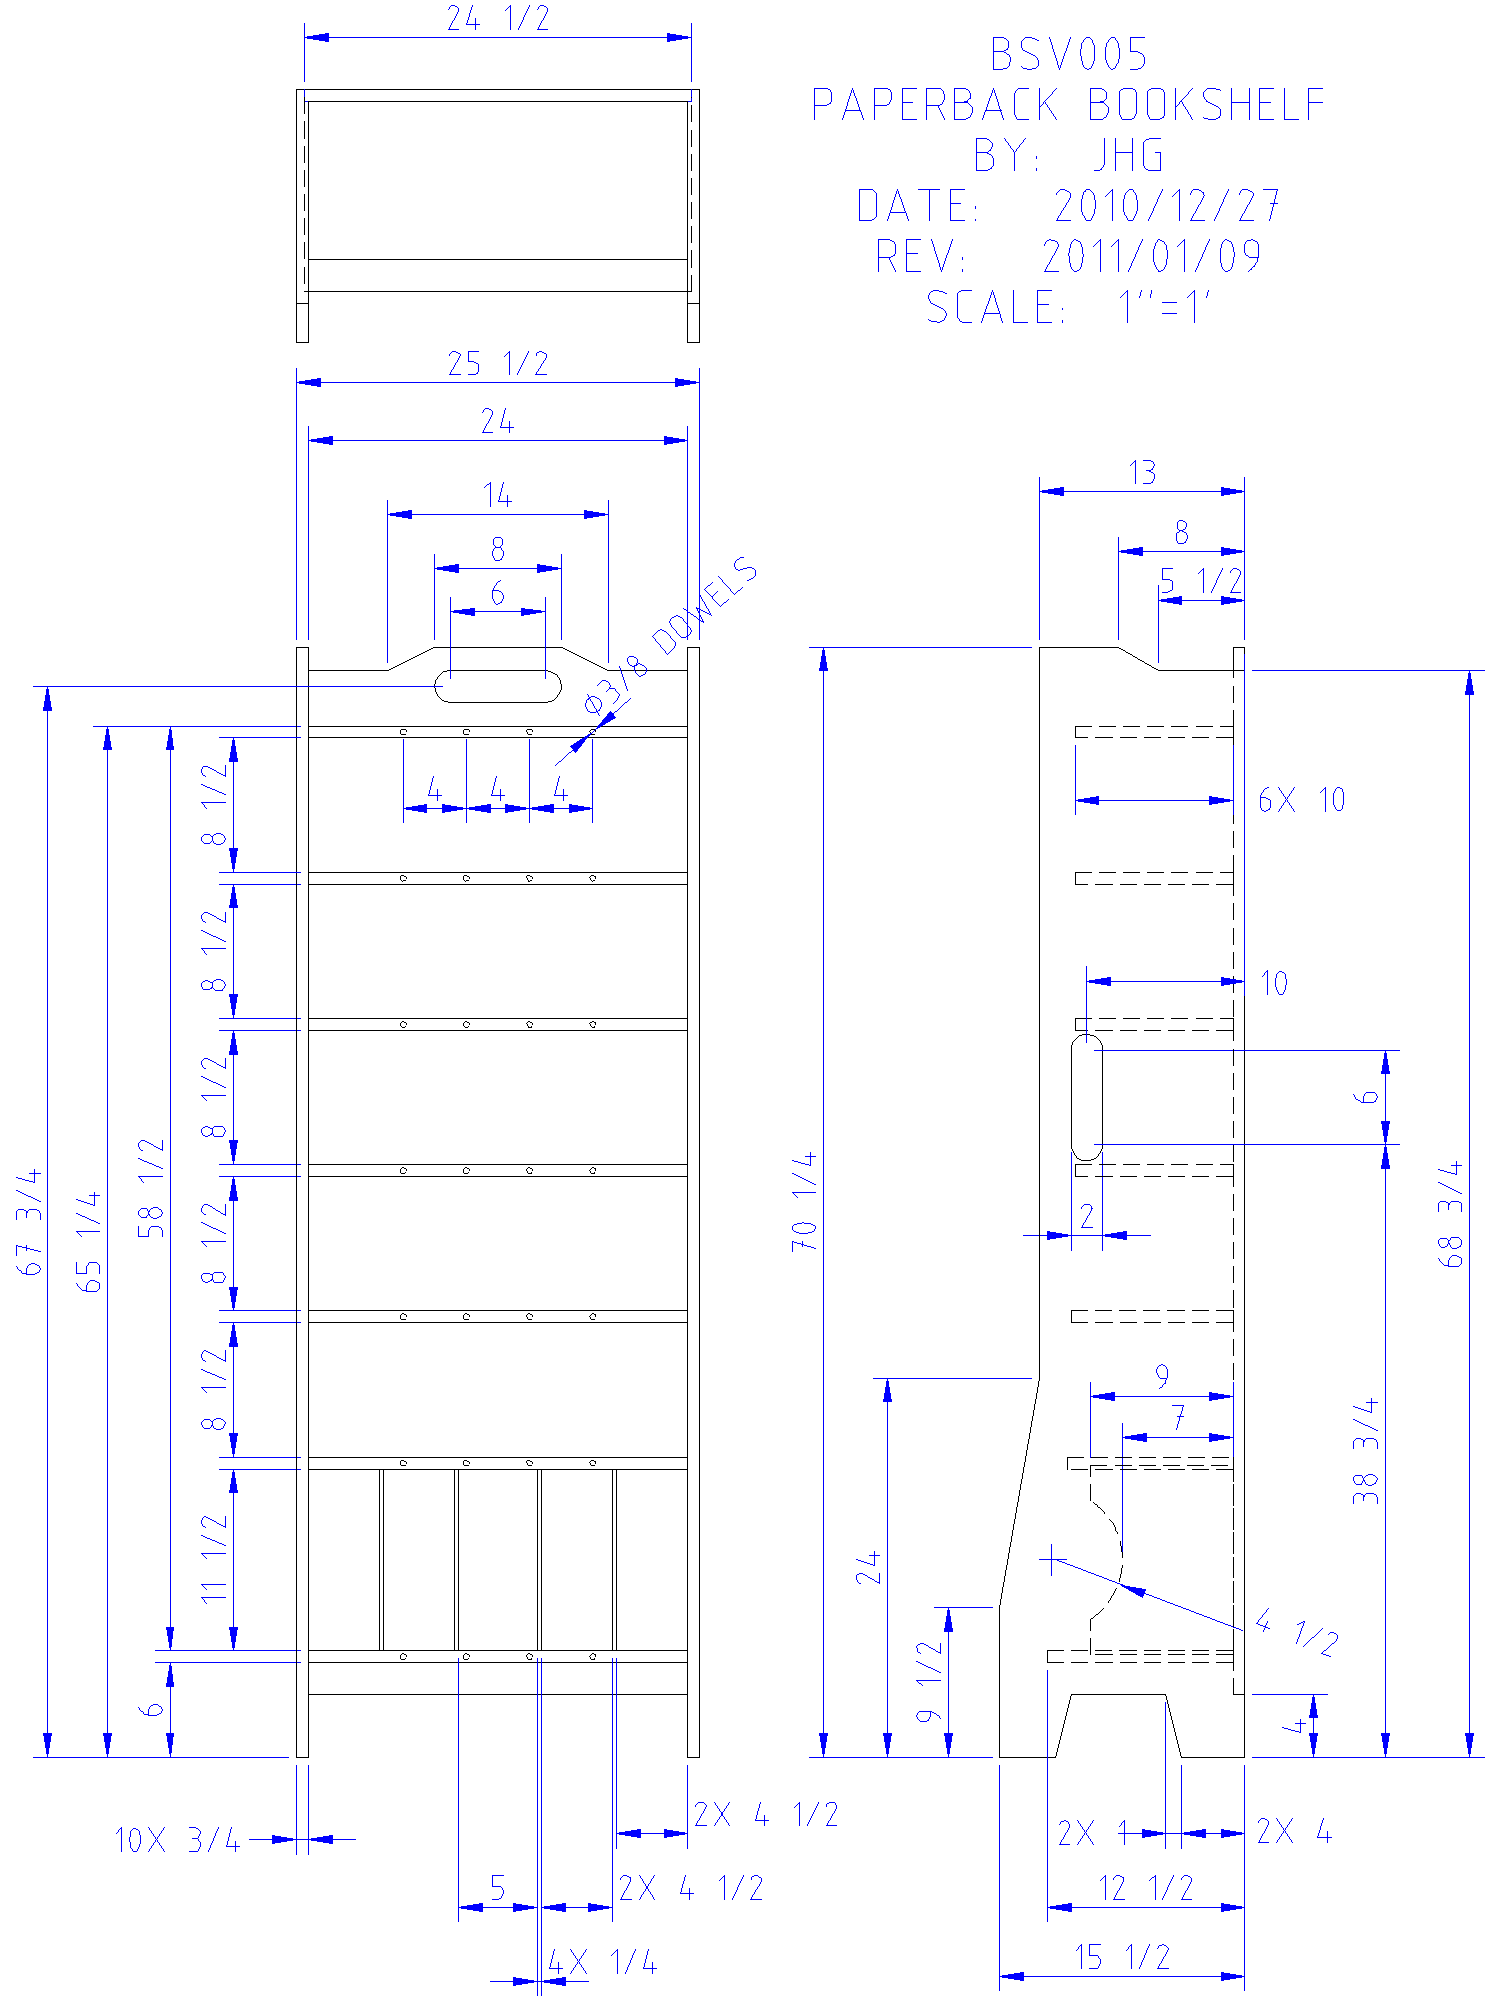
What you are looking at below is my paperback and magazine bookshelf, based on drawing BYS005. The paperback shelves are 8 1/2" high, allowing for efficient storage of small format books. Presumably, you have large shelves around for your larger books. The shelf at the bottom is for magazines, and it is 11 1/2" high. If it were 13" high, you could use it to store long playing records.
The drawings above are for a series of bookshelves, all intended to be made from knotty or select pine. I suppose you could use a hardwood of some kind, but I don't think this design looks formal enough for it.
Click on the photos to see them in larger scale.
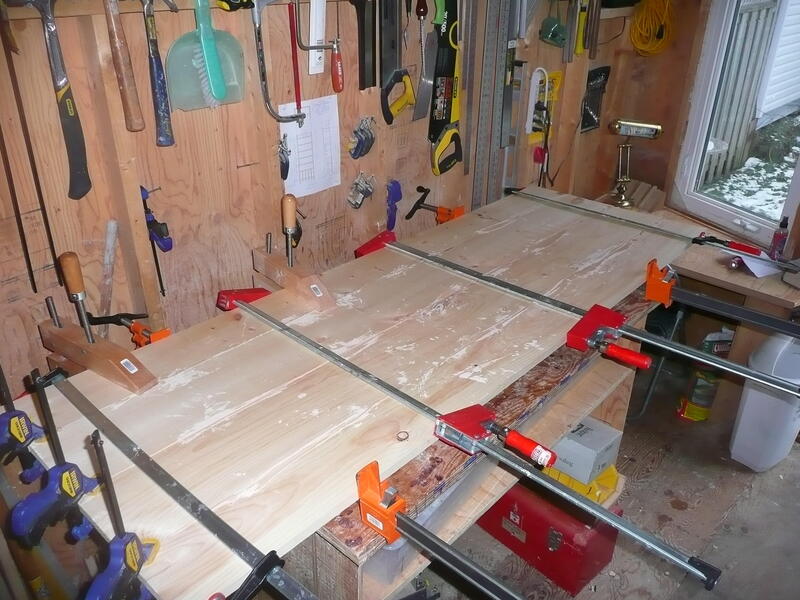
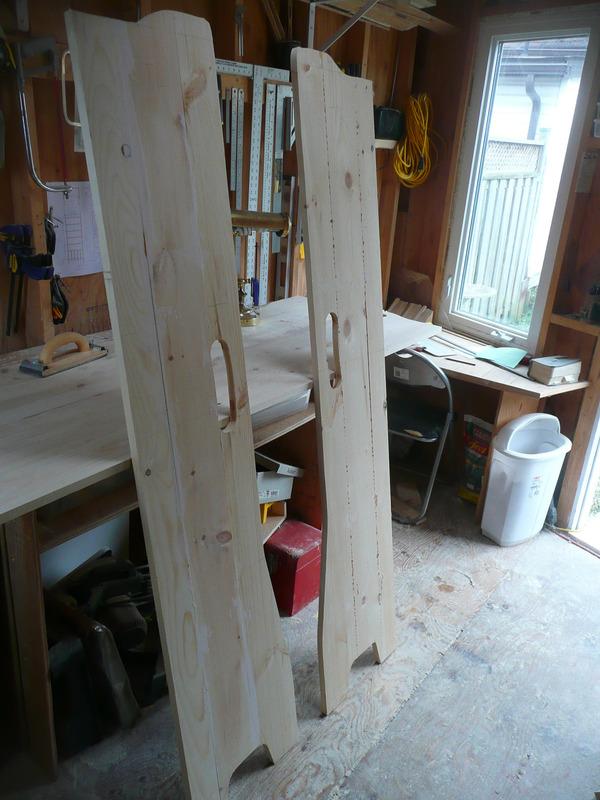
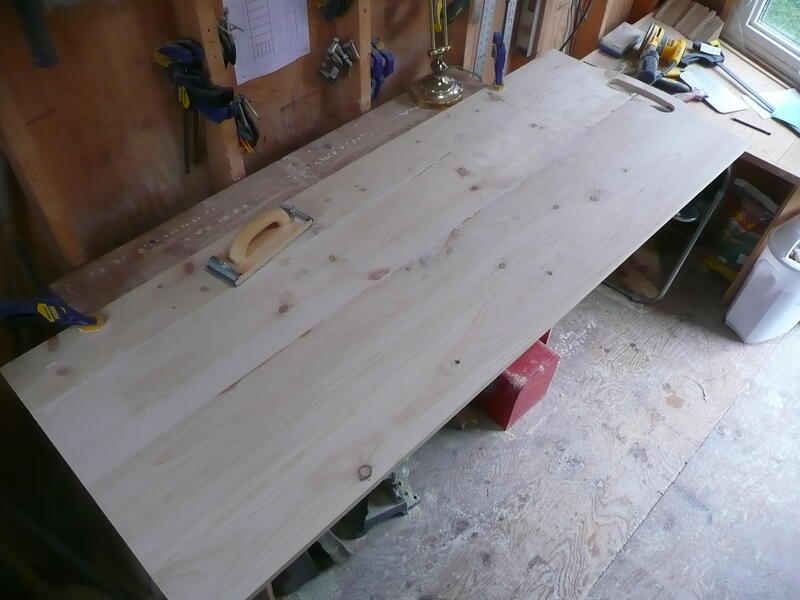
If only pine came in 24" widths. All the panels require glueing up, and lots of sanding. My drawings show straight edges. I curved them all a bit to make them look nicer.
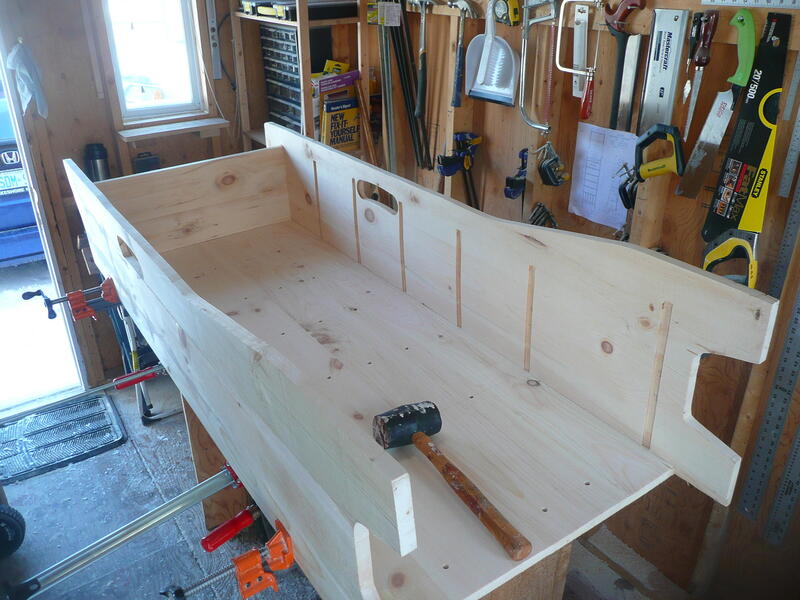

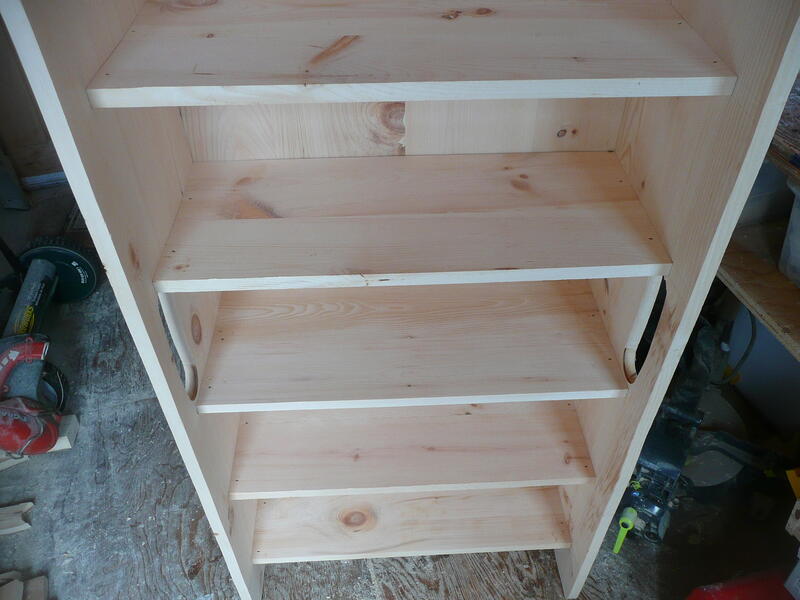
Here is the assembly of the bookshelf. The shelves fit into slots in the side walls. They are supported by dowels and screws through the rear panel.
The magazine dividers are made from 1/4" birch plywood. This is what I found when I searched the lumber store.
I clamped everything together and I assembled it with cabinet nails. I hammered these through the side walls into the rear, through the rear walls into the sides, and through the bottom of the shelves, at an angle, into the sides.
I finished this thing with several coats of linseed oil. Note how the design allows me to turn it upside down. Since it was winter, and my work shed is not heated, I brought the shelves indoors for finishing.
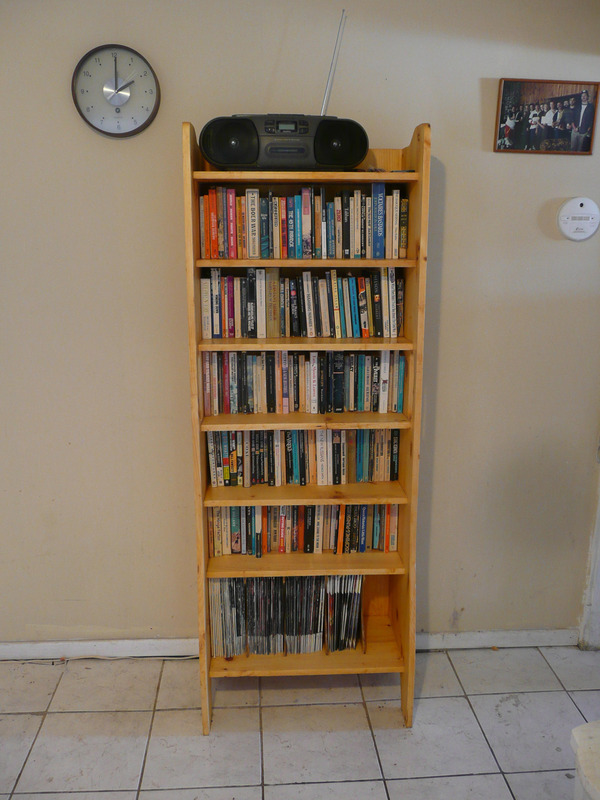
The bookshelf lives in my kitchen at the moment. I have had no problems filling it with paperbacks. I have some room for new edtions of Skeptical Inquirer. What you see here is every single issue since they went to the large magazine format in Jan/Feb 1995, to March/April 2011, over ninety issues.
When you buy bookshelves at IKEA, the back is thick cardboard, or some thin fibreboard. On this bookshelf, the back is solid pine, 3/4" thick. This puts the centre of mass at the rear of the shelf, which means it tips back towards the wall, not forwards on top of you, your kids, your pets, or your drunken friends.
I paid around $160CDN for the material in late 2010.
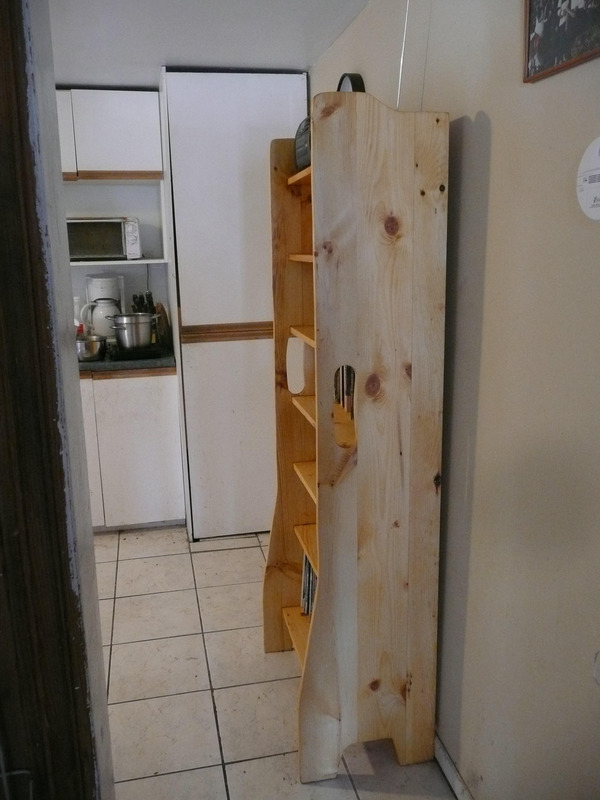
I think it looks pretty good from the front and from the angles. If the shelf is going to be visible directly on the side as in the third photo, I will have to add more detail.
 The dowels through the rear panel support the shelves, but the rear
panel bulged back a bit. I had to install a few screws. Next time, I
use just screws.
The dowels through the rear panel support the shelves, but the rear
panel bulged back a bit. I had to install a few screws. Next time, I
use just screws.
Apparently, linseed oil never completely hardens. Around books, partiuclarly paperbacks, and magazines, this is not good. In the future, will be varnishing these shelves.
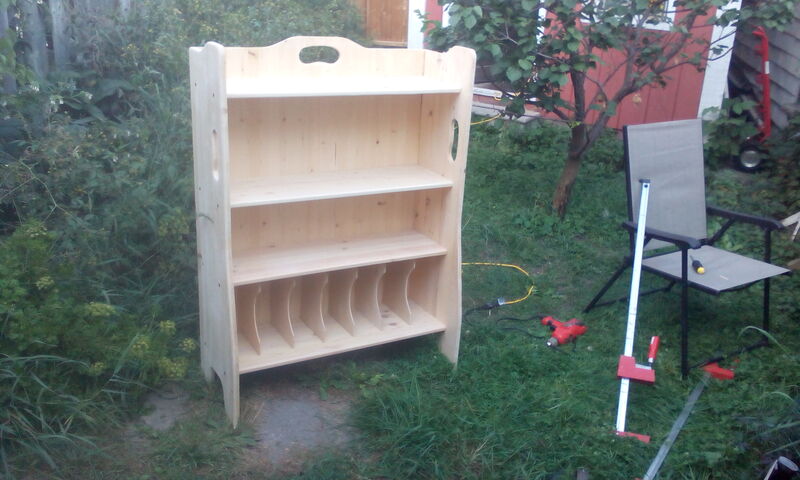
To the right, you see my latest effort. This is a lower, wider shelf that fits under some cabinets. I used varnish, not lineed oil. Again, I did magazine racks on the bottom.
![]() Howard Gibson —
Email
hgibson@eol.ca
—
Last updated:
2016Dec28
Howard Gibson —
Email
hgibson@eol.ca
—
Last updated:
2016Dec28